When I was a kid, my mama and/or lola (grandmother) would always ask me to help them with gardening. This happens especially during the weekends or on weekday afternoons when I get home from school. As a kid, I hated it. I hated labouring in the garden, pulling out weed in a squatting position, and getting garden tools to and fro. It’s tedious, meticulous, and I don’t understand why there’s so much pleasure doing it. I’m pretty sure every other kid my age back then hated it as well. All we kids wanted to do was either watch TV or play with other kids in the neighbourhood ’til sundown.
Fast forward twenty-plus years and here I am, keeping myself busy on weekends and getting all hyped and excited each time the sun is out because well, wadaya know, it’s a good time to do gardening.

I’m not sure what the heck happened to me but whatever it was, I’m sure that choosing to do gardening, rather than being forced to do it, is an adulthood milestone and it 100% validates that one is a full-fledge grown mature adult. Needless to say, not only have I reached that milestone, but I’m on top of it, I’m nailing it, and yes, I’m one damn proud PlanTito – an uncle who enjoys plants, planting, and everything about gardening.
My current place
Before I share about my project, let me paint you a picture of the place I currently live in.
The place I am currently renting is a granny flat. If you’re not familiar with it, it’s basically a small house that’s inside the property of the landlord (usually at the far end) that is completely detached/separated from the main house. It has its own kitchen, bathroom, and everything that one would need to live independently. Sometimes, granny flats have their own gates and fencing for privacy. Mine don’t and I’m sharing the yard with my landlord. Their backyard is practically my front yard.
NOTE: It’s called a “granny flat” because these small detached houses are usually built for, you guessed it, grannies / grandparents. These days, Aussies would have them made for rental purposes.
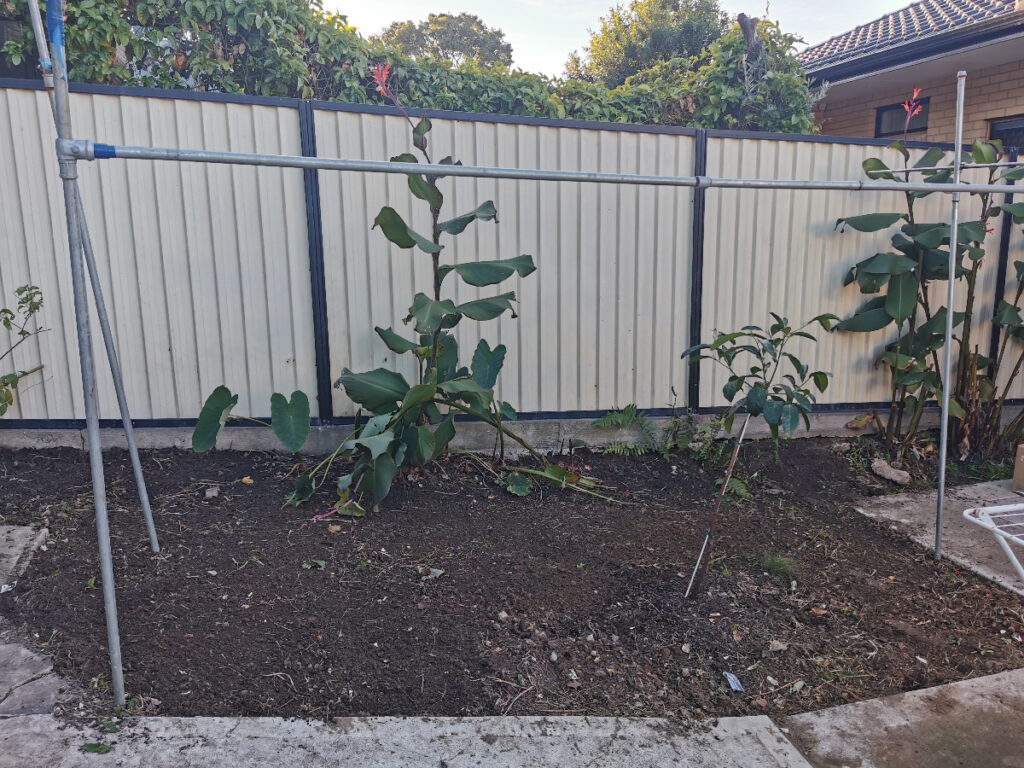
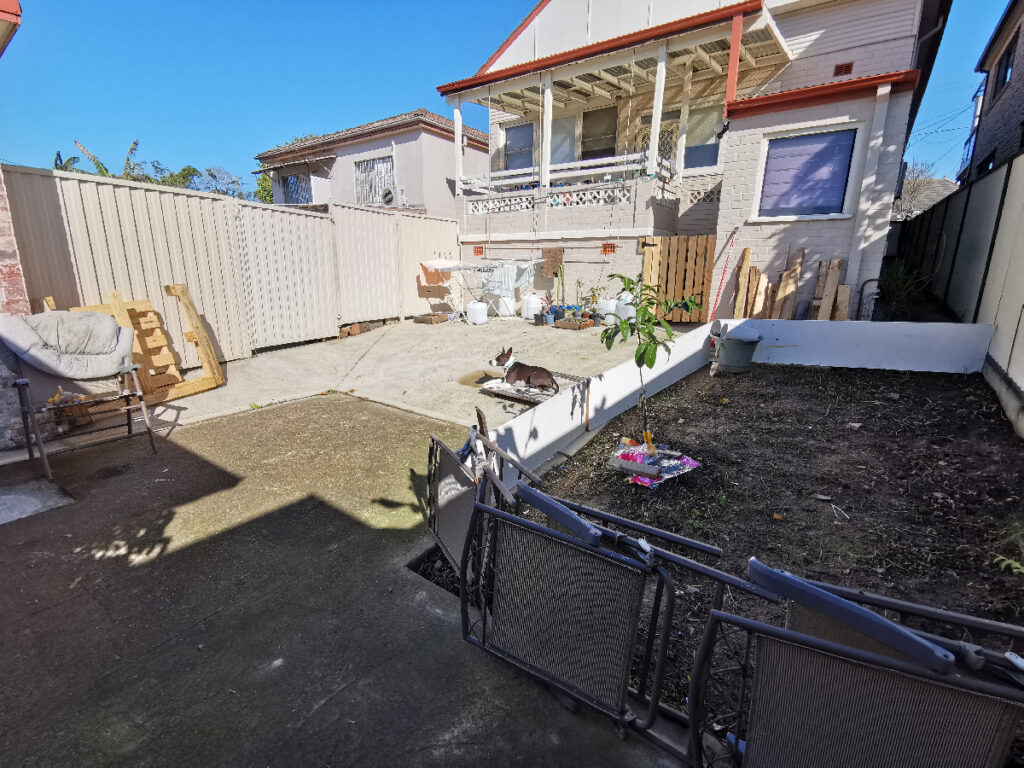
When I moved here back in 2018, the place was amazing. The yard was neat and spacious and even my landlord’s kids would always play in there. The property was gated, it was secure, and there’s plenty of sunlight. Unfortunately, after a year or so of neglect and unplanned gardening, the yard became a mess.
The problem
My landlord would randomly plant vegetables here and there and the small plants he had on plastic containers were left to themselves. He’s Chinese and so he would try marcotting the tree he planted (the tree is still there and I’m still not sure what it is) but those kept dying as well as he didn’t have much time watering them. He planted papaya, squash, sayote (pear squash / vegetable pear), and gabi (taro plant), to name a few.
They were good plants but and they yielded good quantities of fruits / vegetables. But unfortunately, once they were left unattended, they became messy. The squash was crawling all over and the everything was just taking over the backyard. One time, there was a storm that came with really strong winds, all the papaya came down. I ended up uprooting the halves and throwing them away.
Insert the pandemic
At first, I didn’t bother. At the end of the day, when I get home, I’m almost always inside the house. Not only that, I’m too tired to be bothered thinking about it and I don’t see the yard all the time anyway. It’s not like I’m out there in the yard every morning sipping a cuppa.
So when the pandemic came and we were forced to work from home, that’s when I finally saw how horrible the situation was. And after six months of working from home entirely and another six months of working in the office only for two days in a week, and seeing the yard almost every single day and in-between, I’ve had enough. “This place looks like shit!” I told myself one time.
That’s when I made the decision to clean up everything and start from scratch.

Step 1: Planning and yard preparation
May 2021 – The first phase is clearing the yard. My plan is to take out everything. Literally everything, including those poles where the sayote have crawled. Then I’m gonna seed the yard with lawn grass and make a planter box by the fence on the left side. That’s where all the veggies will go. I’m gonna move the poles there as well so if my landlord is still keen on planting sayote, they still have somewhere to crawl up to.
Or at least, that was the plan.
The first time I tried clearing everything, I wasn’t able to finish. There were just too much weed and vegetation and the bin was just too small for all of them. I had to clear the yard multiple weekends and each time, the sayote kept crawling further and further.
July 2021 – After a month or so of trying to clean up the yard halfway and not finishing, I spent an entire weekend clearing it all up and I was finally able to remove everything that I wanted to be removed. By now my landlord will just have to live with it. I’m the gardener now. *insert evil laugh here*
Step 2: Treating the lawn
Once all the weed had been taken out and the ground raked thoroughly, I had to make sure that the weeds don’t come back. To do that, I sprayed weed killer all over it. I wasn’t able to do this right away because it kept raining. According to instructions, the weed killer must be applied when there’s no rain forecast in the next 24-48 hours. Otherwise, the weed killer will just be drained away or be absorbed in the soil and not by the weed seeds.
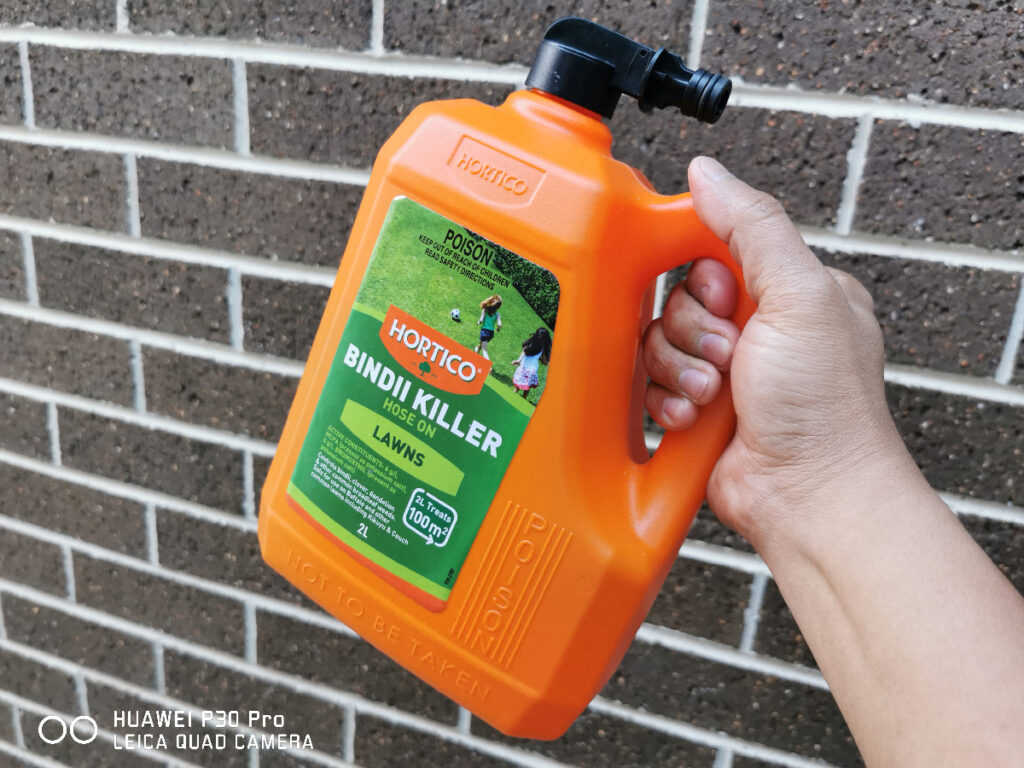
When I was finally able to treat the ground with weed killer, I had to make sure Buddy doesn’t walk on it because, as the label says, the weed killer is poison.
I was able to find some old cabinet walls somewhere and that’s what I used to surround the treated ground. I’m not sure if that did the job of keeping Buddy out because I never saw him once inside but I did find some poop. So maybe he did get in and the DIY fence didn’t work? He didn’t die though so that’s all that matters.
Should have put a sign that says “Buddy, stay out!”
Side quest: making a gate
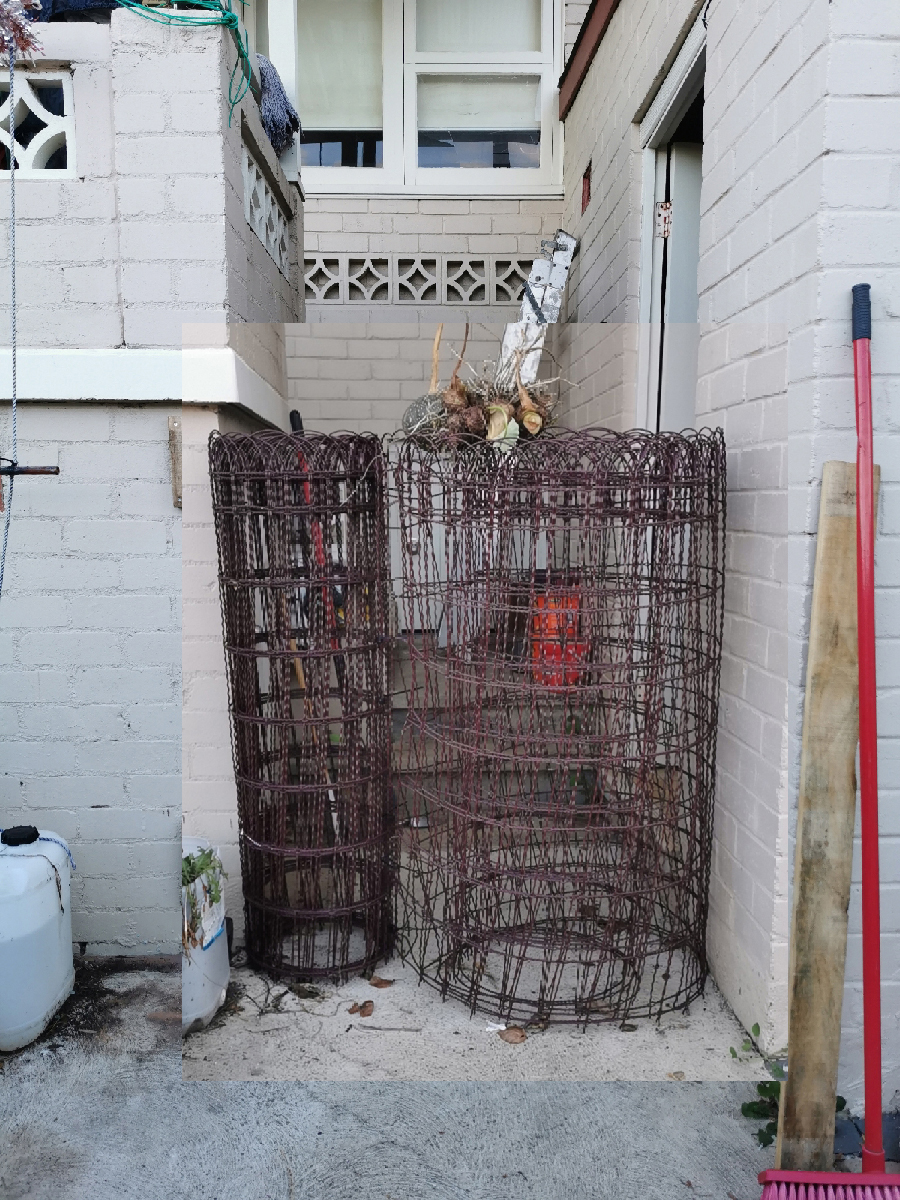
Another thing that was such an eye sore for me was the makeshift “gate” that my landlord placed by the steps to their balcony. It wasn’t much of a gate, really as getting through it was a pain in the ass. It’s a rolled fencing wire of some sort that I reckon he was planning to place around the yard to keep buddy out. Instead, he ended up using it to keep Buddy from going up to their balcony. So, being the good tenant that I am, I took it upon myself to replace it with something functional and nice.
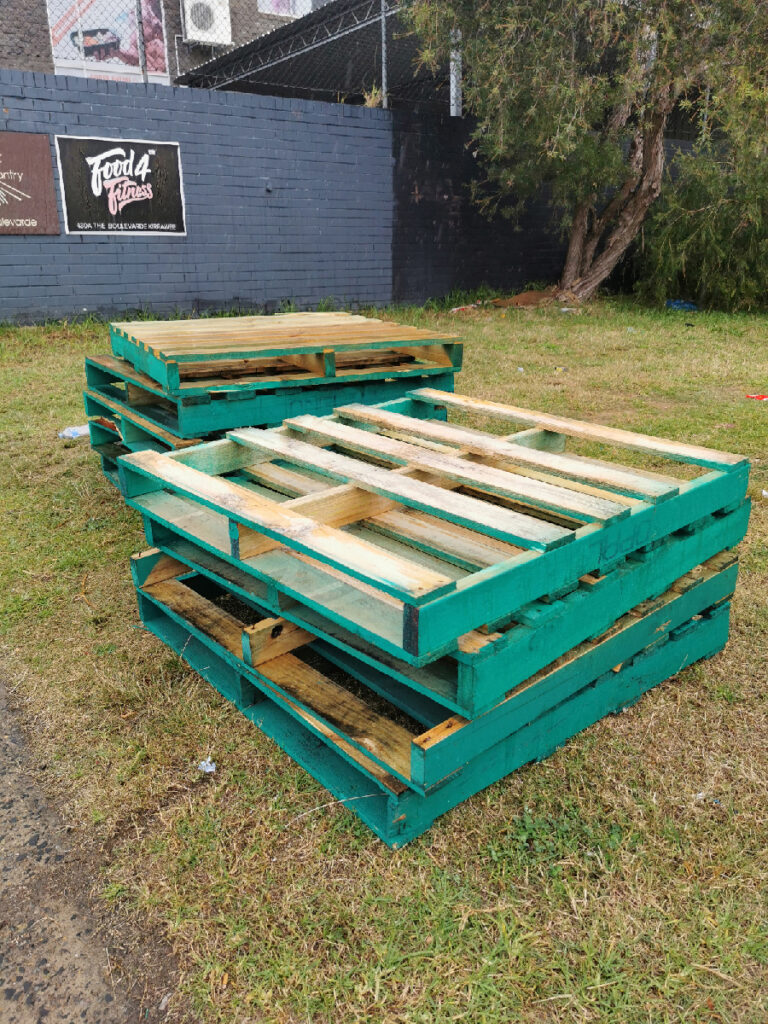
I didn’t want to buy an already-made ready-to-use gate at Bunnings (the Australian version of Citi Hardware in the Philippines) because not only was that expensive but also that would forfeit the whole DIY project thing. So I went around looking for pallets in a nearby industry area and brought some home. I found some that were just small enough to fit in my car but was big enough for my needs. I only brought home two as I reckon that would be enough and I can always come back if I needed more.
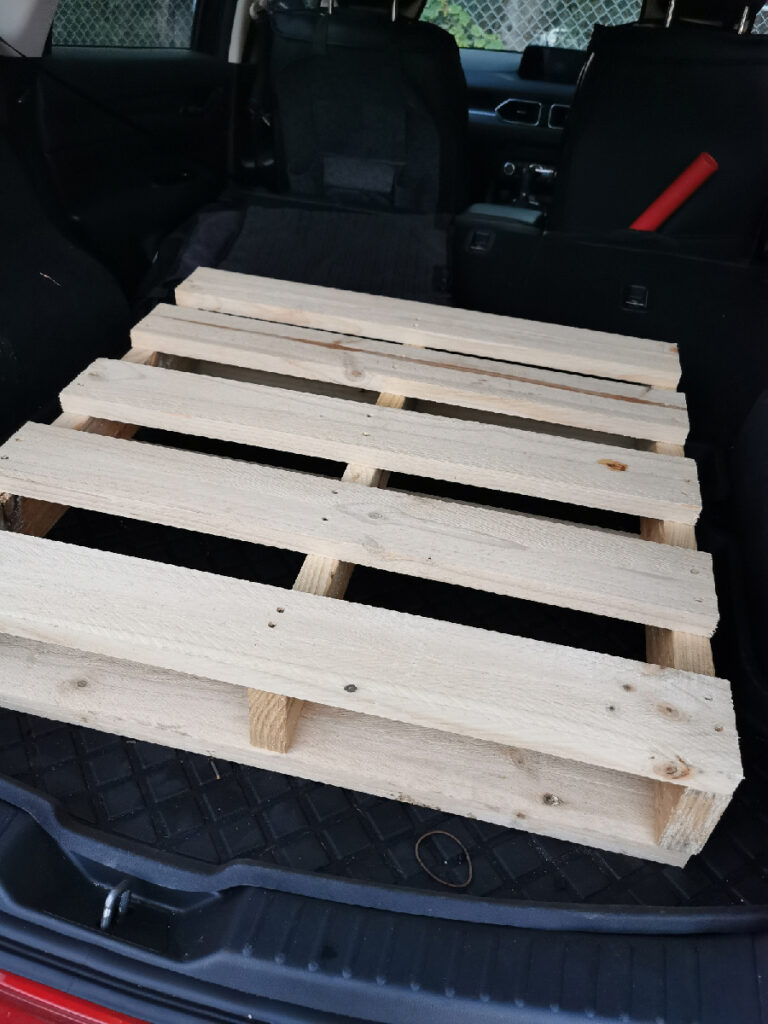
Easier said than done
The hard part was breaking down the pallets to its individual wood planks. I didn’t have a crowbar so it was really tough taking out the nails with just a hammer and a mullet. It looked like the people who made the pallets used specialty timber nails and the planks shattered after forcibly breaking them apart. Good thing I was still able to get just enough wood plank for my gate project.
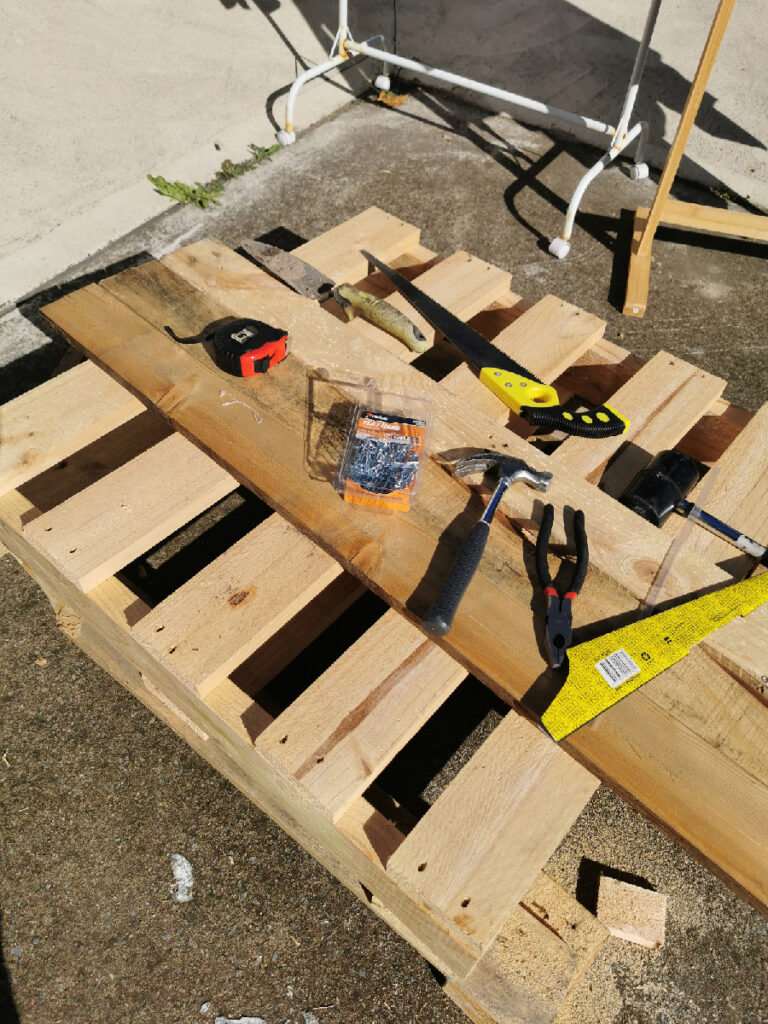
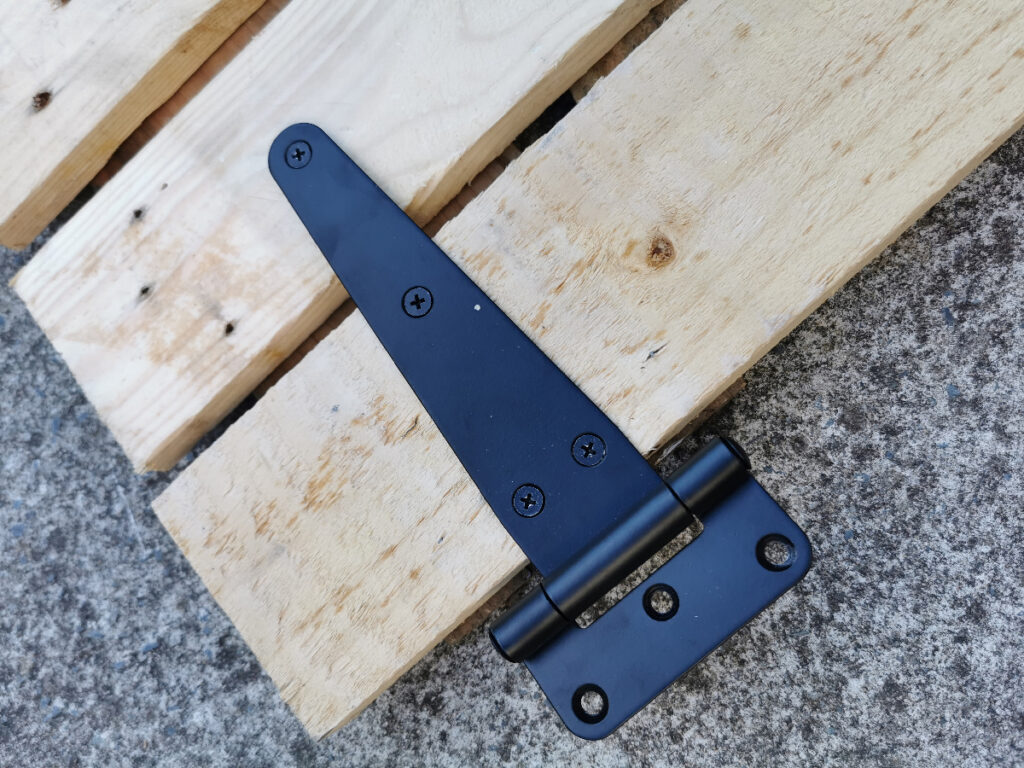
Assembling the gate was easy. With a hack saw, a hammer and a couple of nails, a hand drill and some screws, and lastly a fancy hinge, I got myself a brand new authentic DIY farm gate. Although we’re not in a farm. But you get the idea.
Behold, the finished side quest:

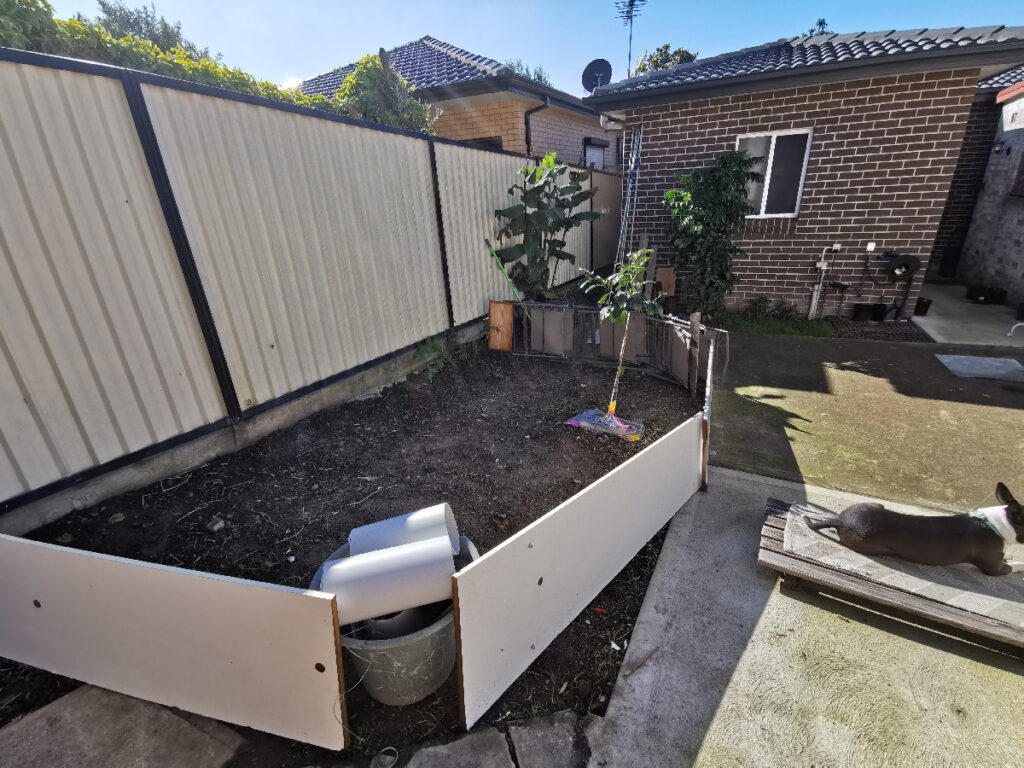
So here’s how the yard looks so far:
Step 3: making the planter box
The next step is making the planter box. For this, I’m gonna need a lot of wood plank. I already used most of the wood I got from my previous pallet run with the gate project so I went back to Bunnings to get some more.
TIP: if you need pallets for your DIY home projects, just go to Bunnings. They have heaps for free. You don’t even have to ask them. Just go there and load as much as you can in or on your car.
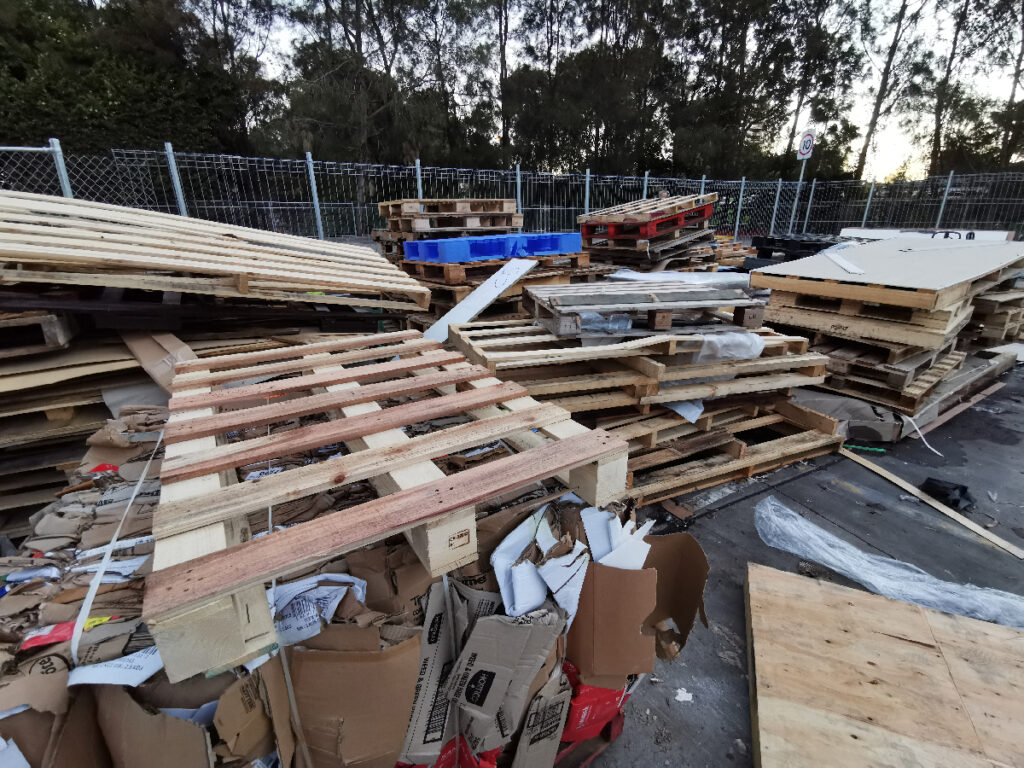
Same as before, without the proper tools, taking the pallets apart wasn’t easy. Once I took them apart, making the planter box was a piece of cake. And even though the ground was sloping a bit, I was able to compensate for that and make a levelled planter box, just like how a real tradie would do it.
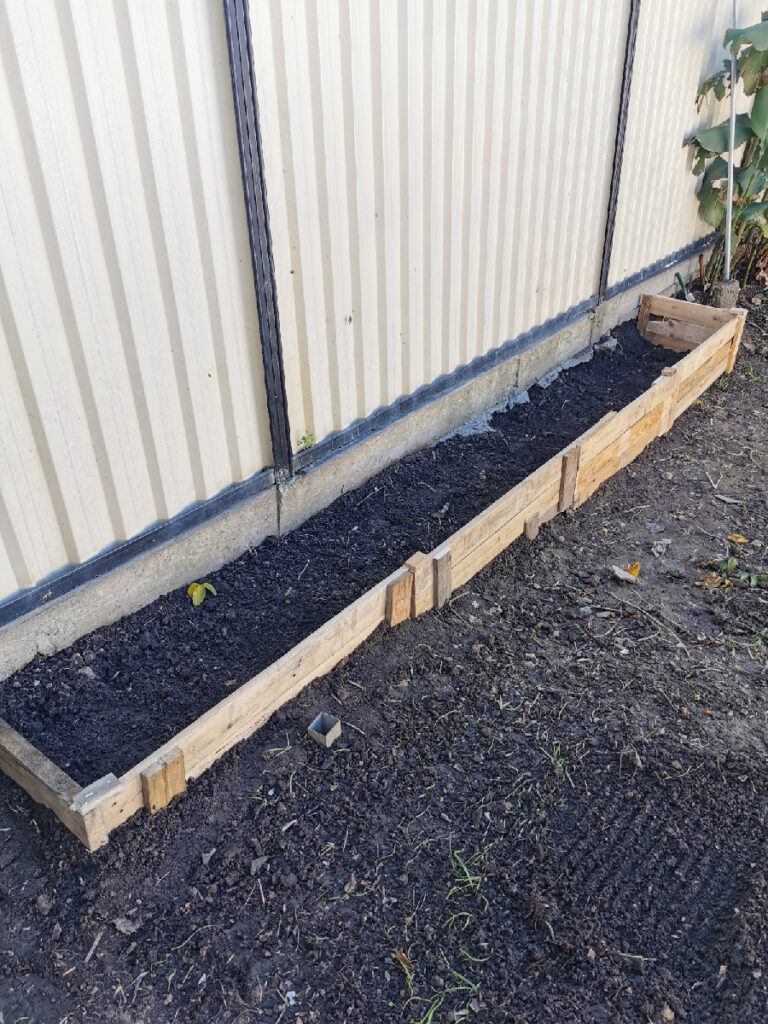
Now all I have to do is buy some garden soil and fill it.
Step 4: filling the planter box with soil, putting mulch to the mango tree, and sowing the grass seed
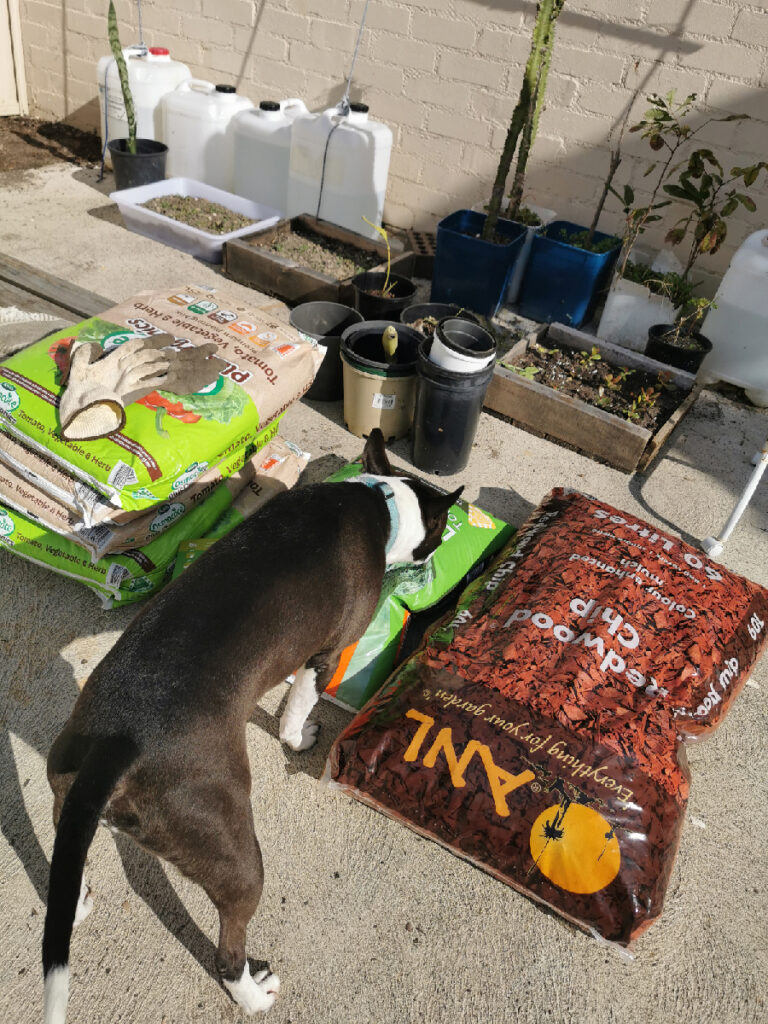
The next step is the part that I’m so excited about. Because although it meant more work (yes, the work never ends), it also meant my vision for the garden / yard is slowly coming to fruition. So I went back to Bunnings for the nth time and bought a box of lawn seed, five bags of garden soil, a bag of lawn soil topper, and a bag of redwood chip mulch.
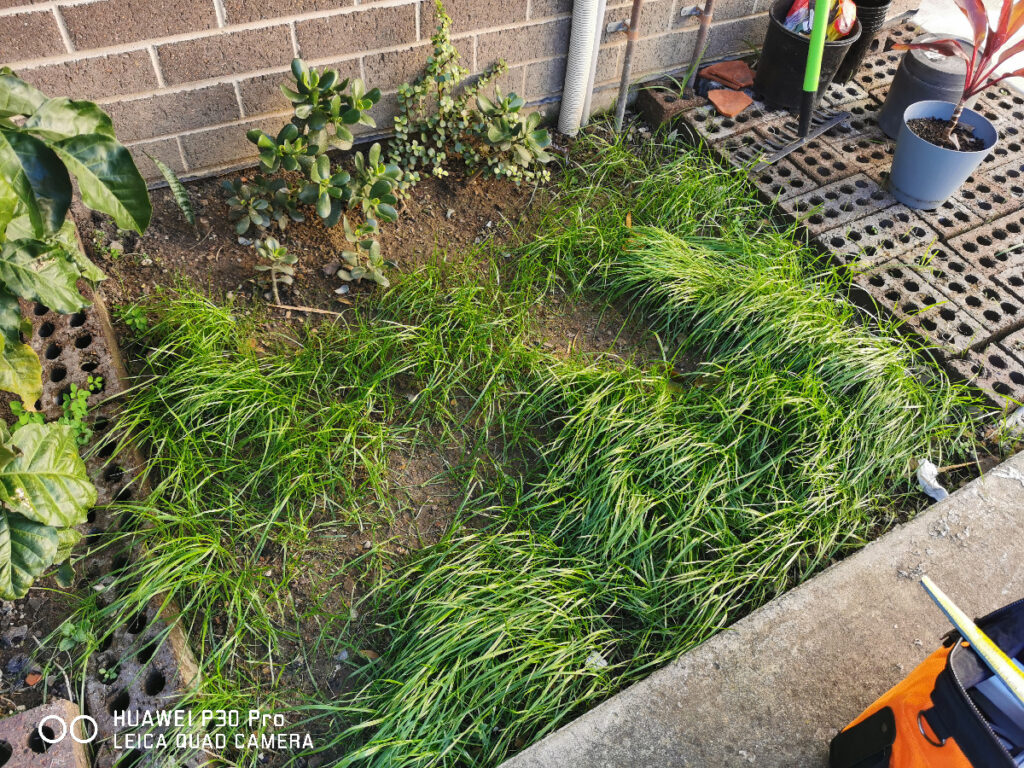
Putting mulch around removes the chances of weed growing around it, allowing it to hoard all the nutrients from the ground for itself. Meanwhile, the lawn soil topper is for the lawn, obviously. Currently the ground is like a mix of soil and clay so I wanted to be sure that the grass seed I’m going to be sowing will have a high chance of growing perfectly.
Trial run
Back in May, I already tried sowing some grass seed on a small patch and there were some areas that the grass didn’t grow. It’s either I didn’t sow enough seed in those areas or because Buddy kept peeing on it. I’m not entirely sure why.
After emptying the five bags of soil that I bought, I immediately realised two things:
- That five bags of soil aren’t enough, and;
- Putting up the poles comes first before filling the planter box with soil.
It was a mistake and I knew I had to make up for it dearly in the future. But oh well.
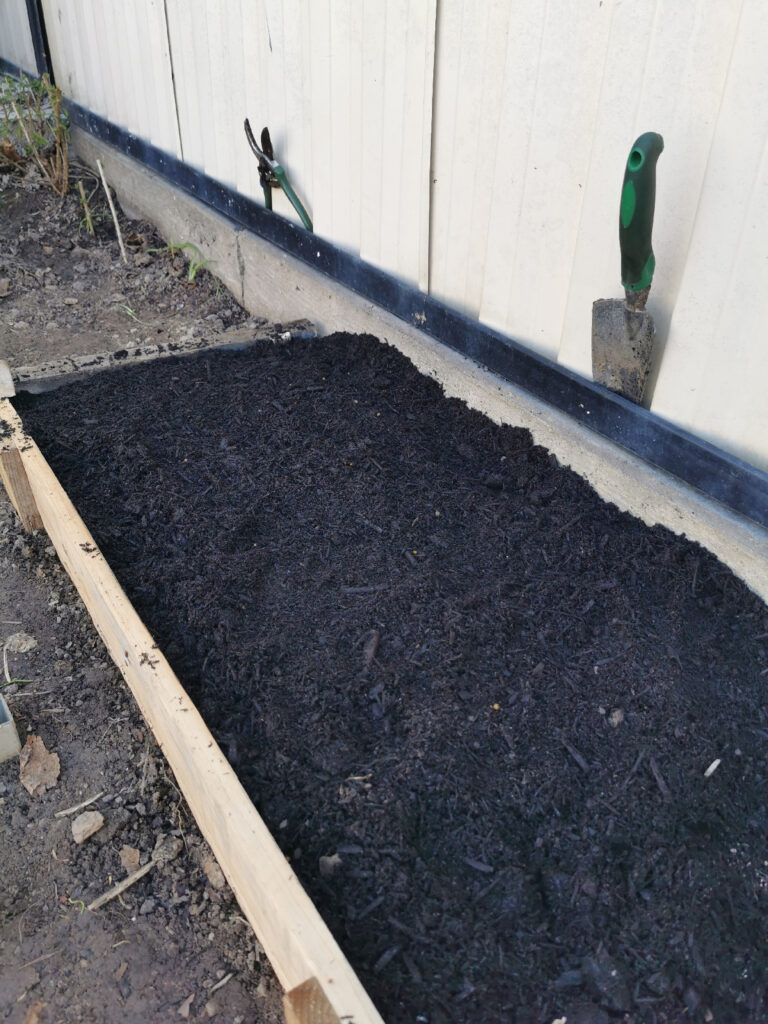
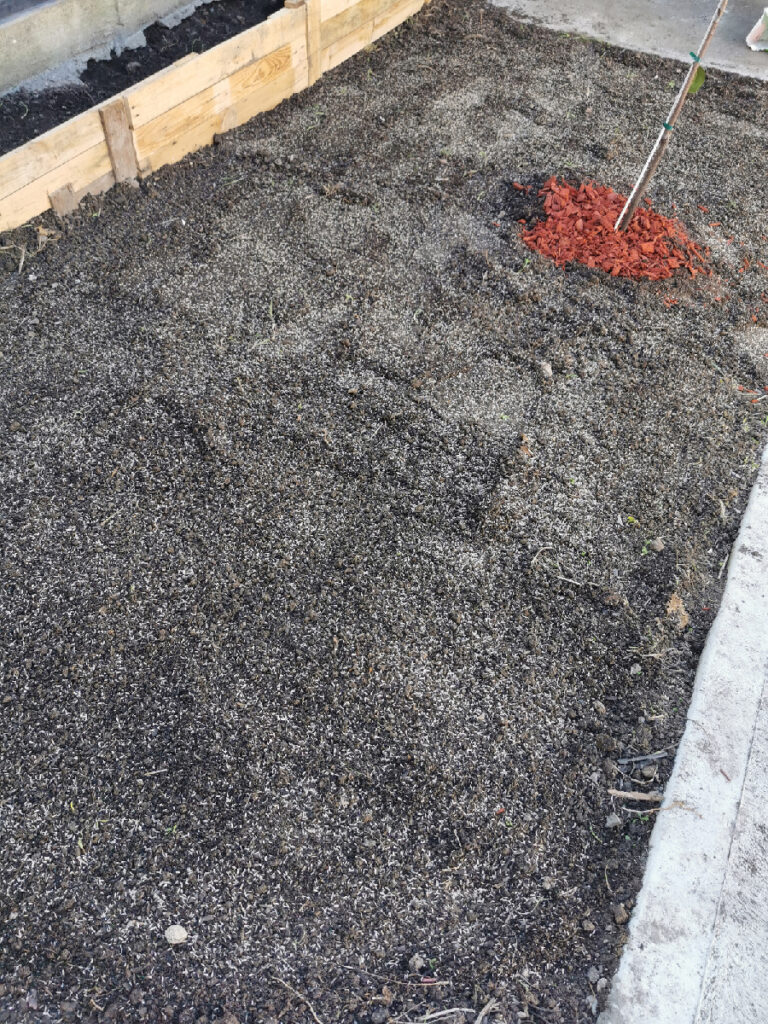
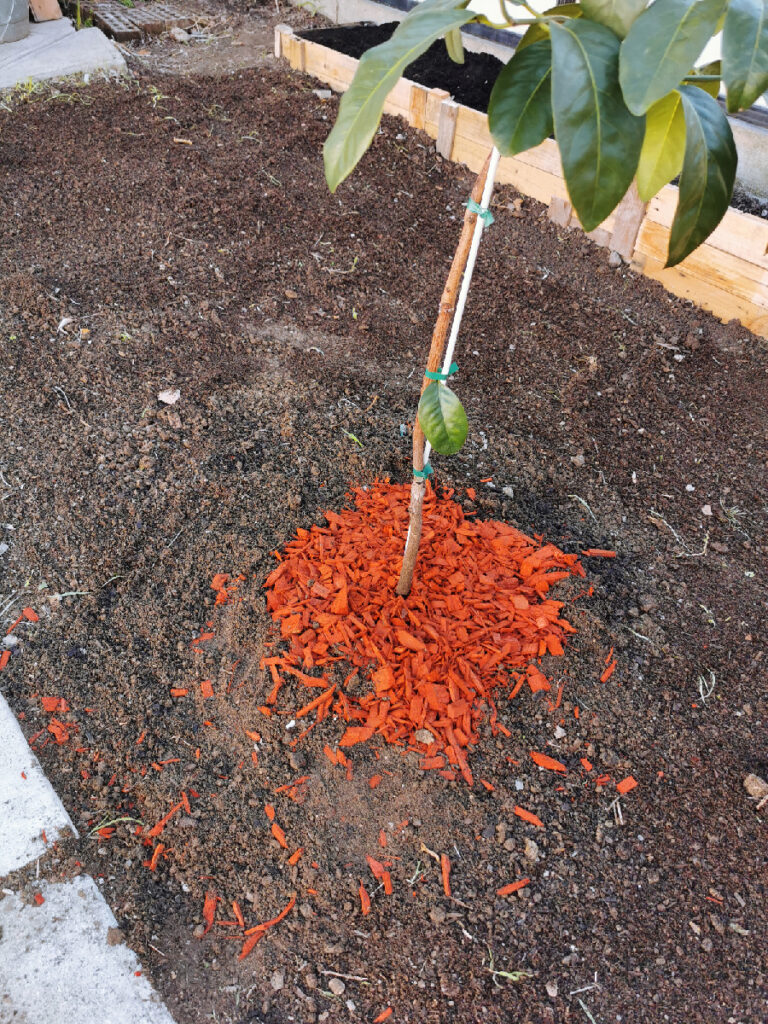
Next was to rake the ground thoroughly, then putting the lawn topper, and then rake again. After that, I placed some mulch under the mango tree. And then finally sowing the grass seed.
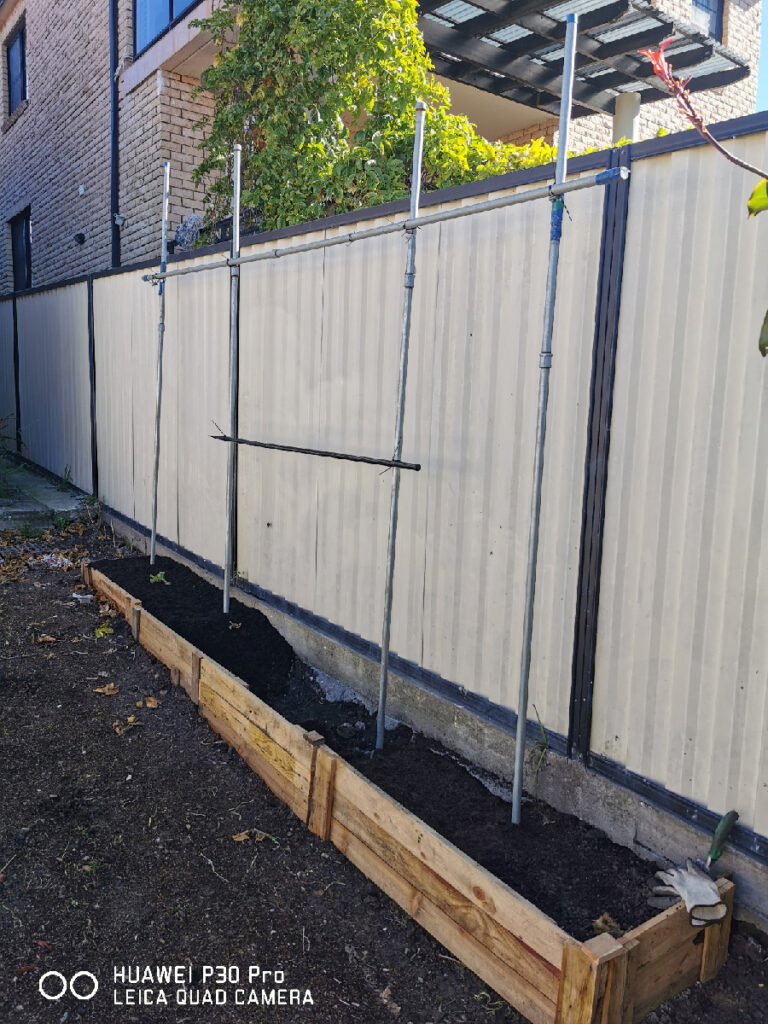
Step 5: putting the poles and filling the planter box with more garden soil
So once again I went back to Bunnings. It’s a good thing that it’s only a 5-minute drive otherwise this project would never be finished.
This time I bought six bags of garden soil, hoping it would fill the entire planter box. And this time, I made sure to put the poles first before filling the planter box.
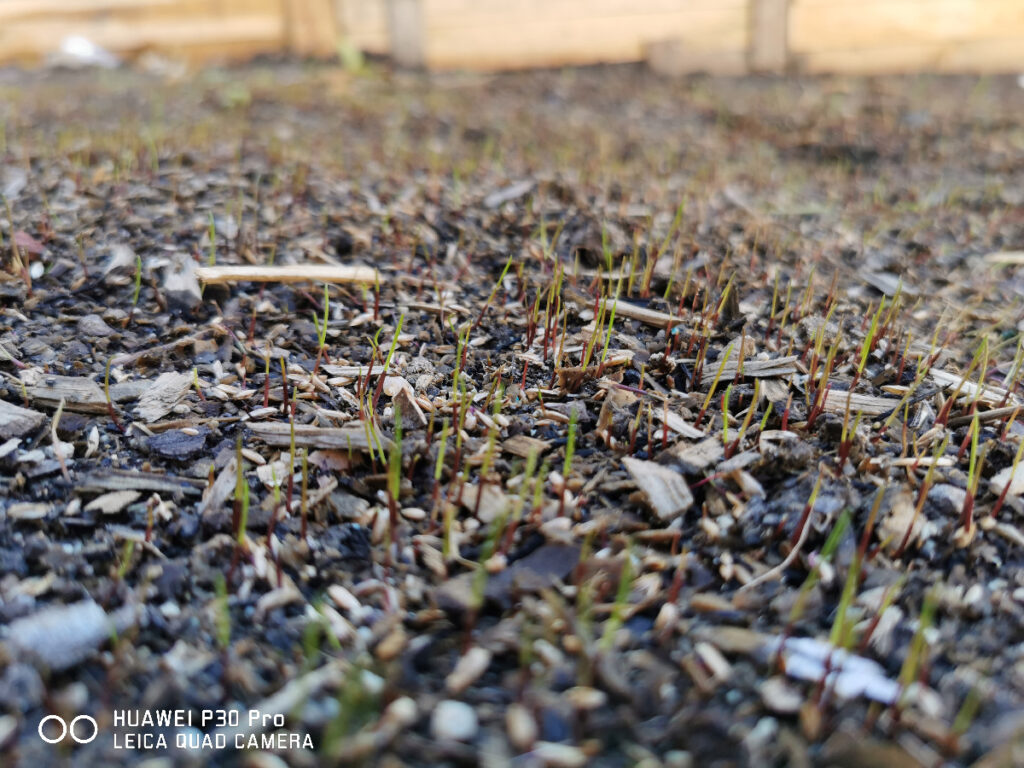
During the days after I finished Step 4, it kept raining so I wasn’t able to continue on my project. But as soon as the sun was out, I was delighted to see that the grass have started to grow already.
After a few hours of digging and with a little help from my dearly beloved, I was finally able to put up the poles. I’m not sure what’s going to crawl on these this time because my landlord already planted his sayote in a separate corner of the yard. Maybe I’ll just plant beans instead? IDK, give me an idea.
Once that was done, it’s time to fill the planter box with the six bags of garden soil I bought. Unfortunately though, it’s still not enough. Six more bags, I reckon? Or ten?
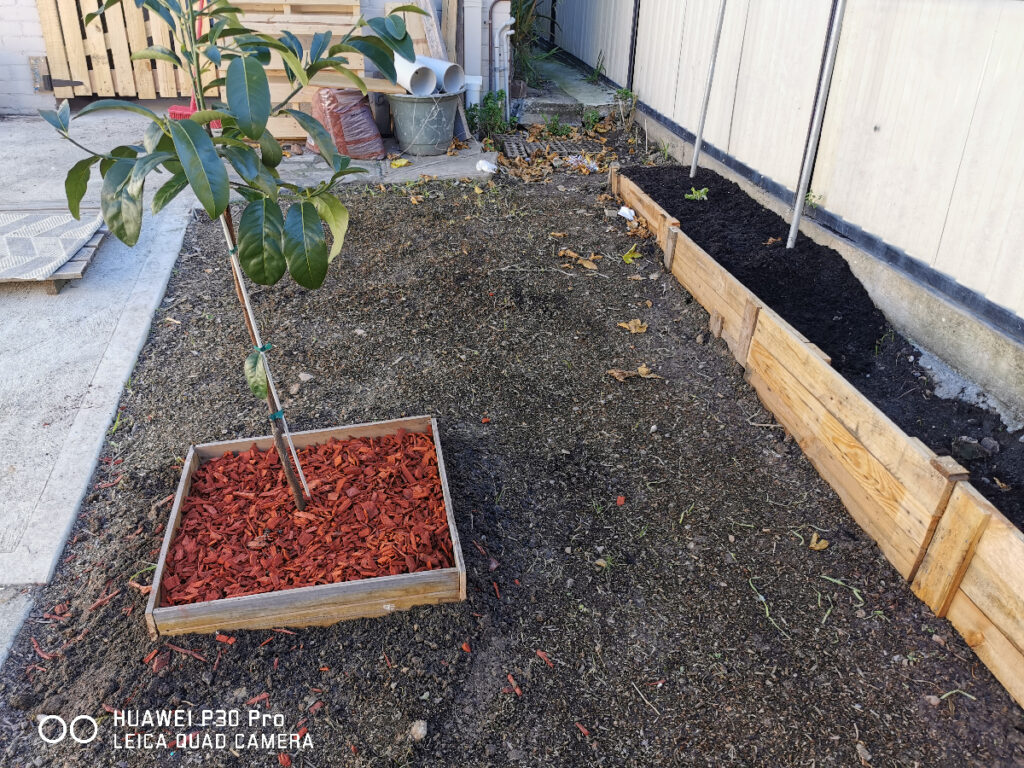
To finish my weekend, I went back inside the house, got my tools, and made a planter box for the mango tree. Then I filled it with more and more mulch.
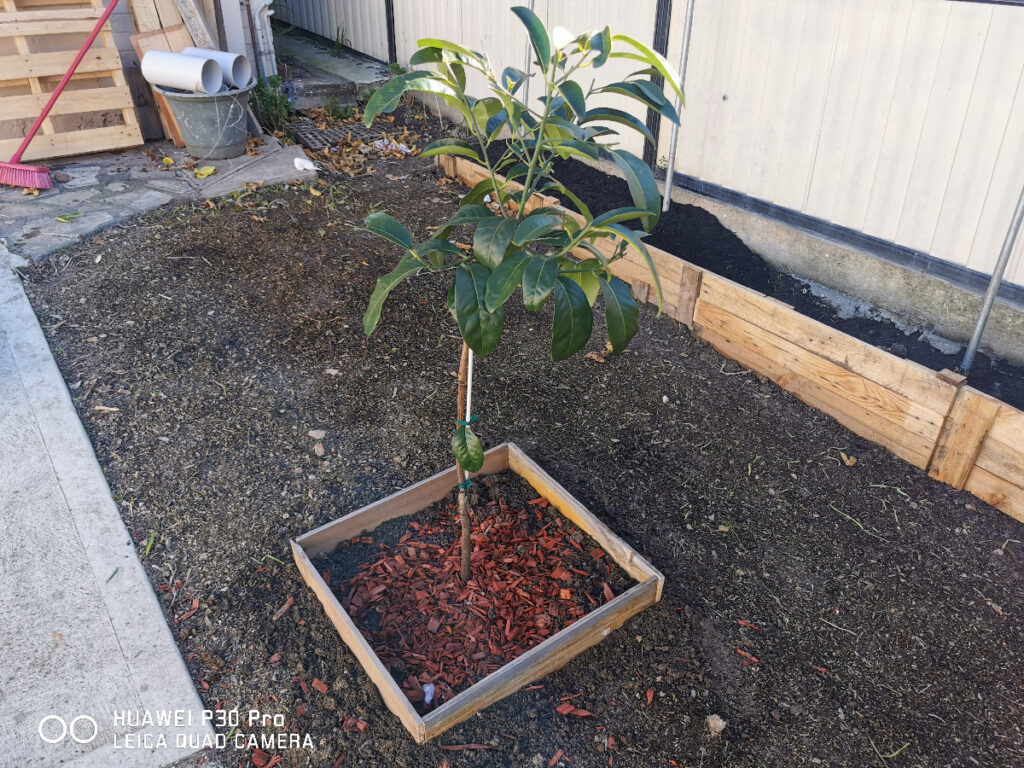
I decided to go generous with the mulch because there’s still plenty to go around and even after filling the box, there’s still more than half of the bag left.
Finale
In the next few days the grass will start to grow longer and I’m so excited for that. Then once Covid restrictions in Sydney have eased up, I’ll go back to Bunnings to buy more garden soil and hopefully finally fill the planter box full.
For now I guess it’s time to think what veggies I’m going to plant in there in case my landlord decides to leave it up to me to plant whatever I want. If you have any suggestions, let me know in the comments below.
I will be updating this post in the future and let you guys know the outcome so stick around to see that.
Cheerio!